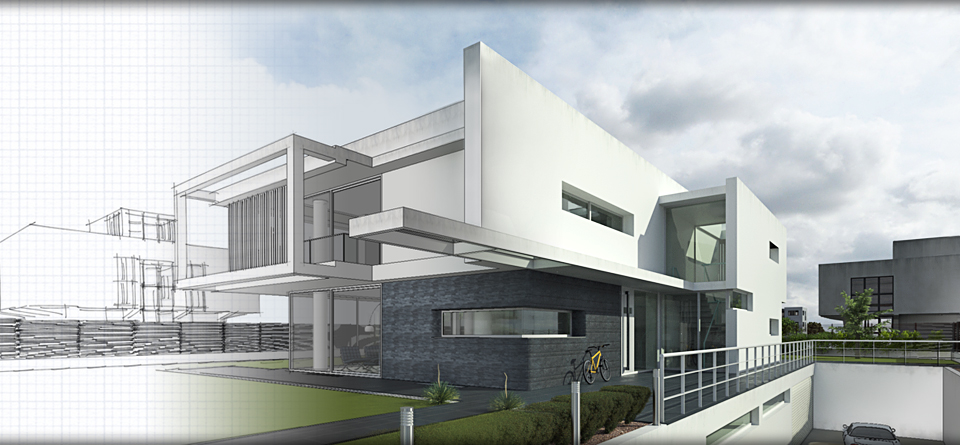
David Hier Render Studio: 3D Modelling & Rendering and Architectural & Product Visualisation

Part 4 - Using Textures to Create Materials
For Use With Thea Render
At this point your textures are ready to be used in Thea Render to create a new material. Before you do this it is probably a good idea to create lower resolution versions of your textures (500px or smaller along the longest edge). These are to be used in your 3D modeling application as they will help to keep file sizes down and won't be as demanding on the software (this is especially relevant to Sketchup users).
I'm going to create this concrete material from scratch inside the Thea Render studio, but the same settings apply if you create your materials using a Thea Render plug-in via your modeling software.
Start by opening Thea and go to File>Scenes>AdvancedMaterialSimulationIBL.scn.thea
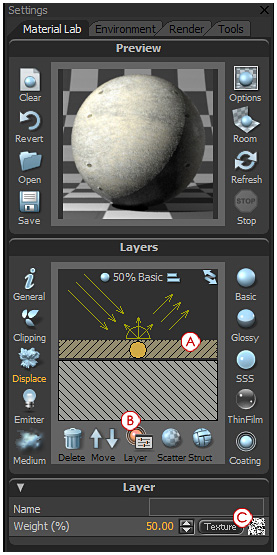
Start Interactive Rendering as it will be easier to see how changes to your settings effect the appearance of the material. Begin by selecting the main globe in the scene and in the Material Lab click 'Clear' and then apply a Basic material.
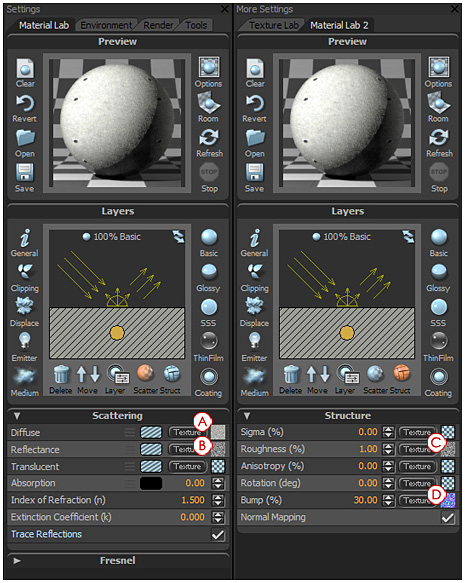
Right click on the diffuse texture button to open the Texture Lab and with the grey texture selected use the Bitmap icon to browse to the tileable concrete texture you created (A).
Apply your reflectance texture to the reflectance slot (B) and set the IOR to 1.3. You can also use the reflectance texture in the roughness slot (C) set to 1%.
You can now apply either your bump or normal texture (D) to the bump slot (remember to check the normal box if using a normal texture). I've set the bump to 30%, but you can adjust this to whatever looks best to you.
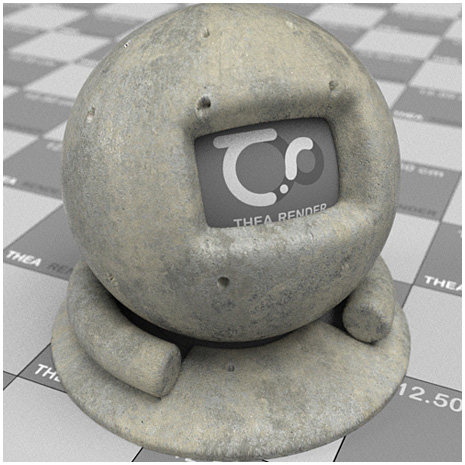
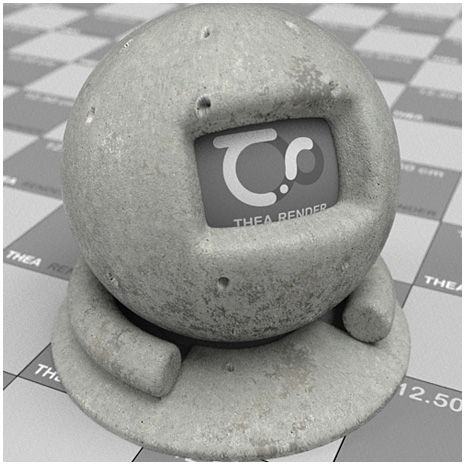
All of the above settings can be found below, as well as an example of what your material should look like at this point.
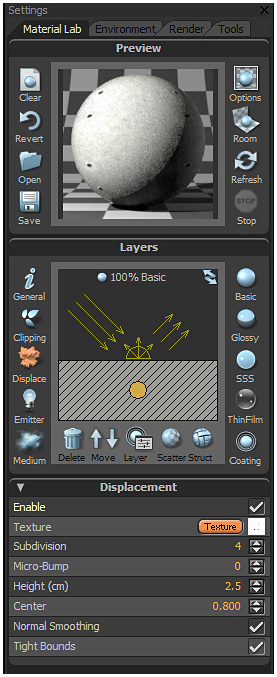
Displacement
Enable displacement using the below settings and use the displacement map you created earlier in this tutorial.
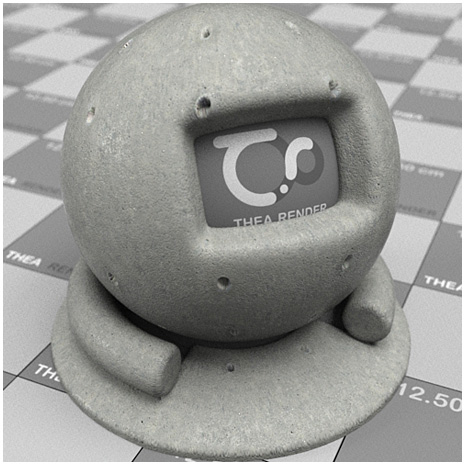
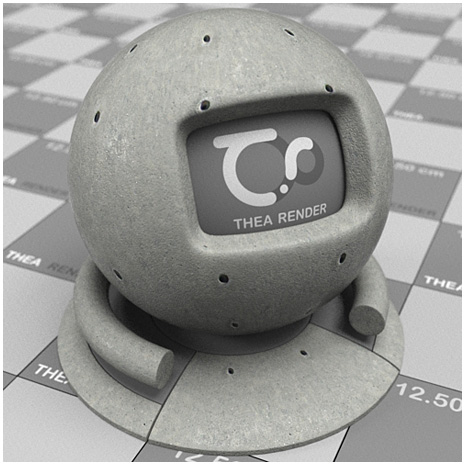
You should end up with a material similar to the one seen in the preview image above.
Dirt Mapping
If you want a more weathered look for your material, you can add some dirt using Thea's layered material system.
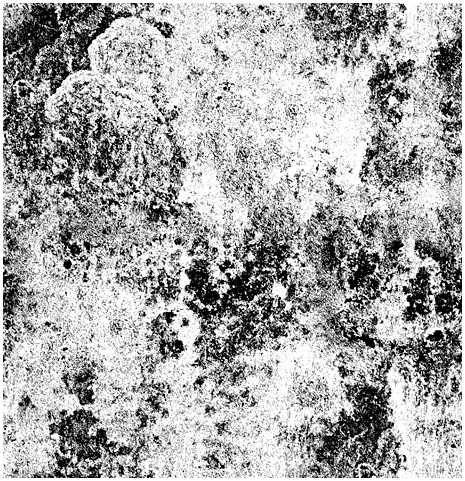
Start by finding a suitable weathered texture. I used this grunge texture from CG Textures.
You can employ the offset method used in Part 2 of this tutorial, or use one of the various texture creating programmes available. In addition to Imagesynth (discontinued) or Pixplant, which I've already mentioned, I have also had some success with Redfield Seamless Workshop and Richard Rosenman's Tiler (both freeware).
Once you have a seamless texture use the techniques described in Part 3 of this tutorial to create a reflectance map for the weathering image.
You also need to create a mask for your dirt texture. The technique I use is similar to that used to create your displacement map. Using Photoshop go to Image>Adjustment>Threshold to obtain a good black and white image. You may want to blur the result very slightly to soften the edges of the mask.
It's now time to return to Thea and use the newly created textures to modify your concrete material. With your concrete material selected click on the Basic icon (A) and use the Move arrows (B) to move the new layer to the top of the stack.
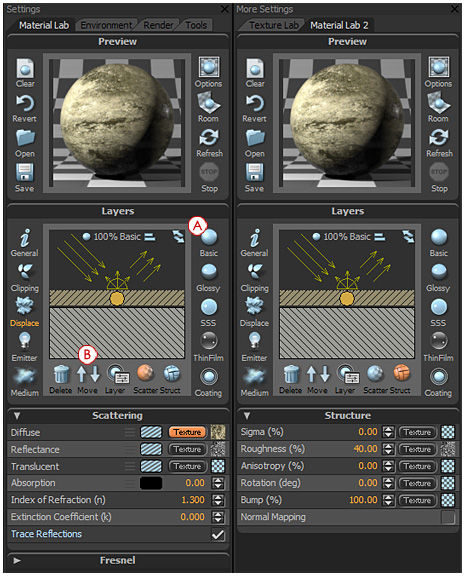
As with the basic concrete material use the main texture in the Diffuse slot, and the Reflectance texture in the Reflectance and Roughness slots. I've set the roughness to 40% because I want the dirt to have a matt appearance similar to something like lichen growing on the concrete.
You now need to use the mask you created to reveal the concrete below the dirt material layer you have created. With the top layer (A) selected click on the Layer icon (B) and apply the mask to the texture slot (C) and set the layer weight to 50%. You can adjust this to reduce or increase the strength of the dirt layer.
The result should look similar to the material preview seen above.
At this point you might find that colour of the dirt is a little too saturated. Rather than adjust the texture in Photoshop we can control the tone of the texture using Thea's Texture Lab.
Right click on the Diffuse texture button for the dirt layer of your material. On the row below the dirt texture thumbnail click on an empty texture slot and use the Colour paint bucket icon (A) to add a grey colour. Drag the texture thumbnail below the colour thumbnail you just created and adjust the slider (B) below the dirt texture until you get the result you want.
I've used a grey colour as I only wanted to adjust the tone and saturation of the texture. You can also use colours to colourise your texture e.g. adding a green colour could make the dirt texture look more moss-like.
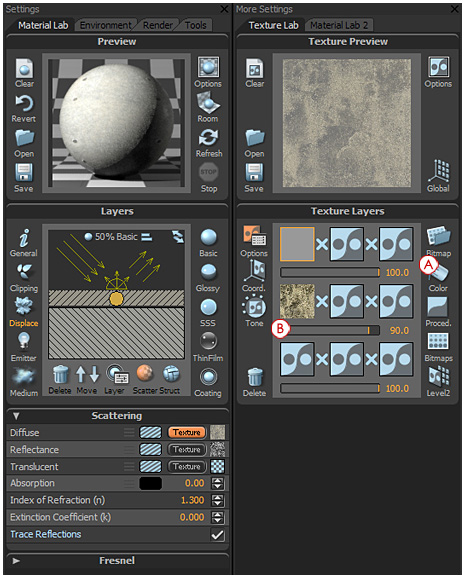
This is also a good technique to use on foliage image textures that are too saturated. It's easier to layer and adjust a colour in one of the texture slots than to go back and forth with your image editing software, altering the tone and saturation there.
Adjusting The Dirt Mask
If you don't think that there is enough of the base concrete material showing through, the first thing to try is altering the scale of the textures used for the dirt layer and the mask you've used for the layer weight. Changing the scale from 1.0 to 0.5 should give good results.
If you are still unhappy with the result you can go back to your image editing software and adjust the mask you created for your dirt material.
Using Photoshop I used a stipple-type brush to paint out large areas of the mask with a white colour. I then used a threshold adjustment (as used above) to further reduce the black areas in the image. I added a small amount of Gaussian blur to soften the edges and inverted the image to get this result:
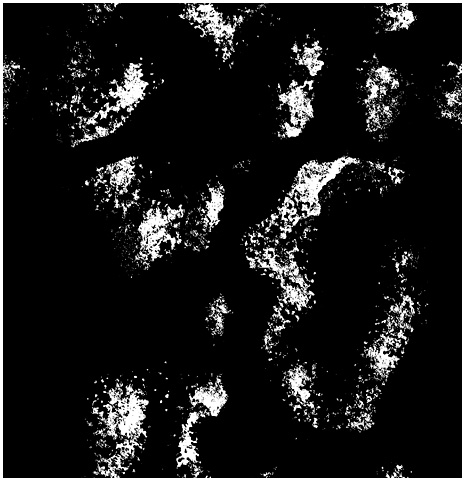
You can download this mask to use for your own materials. When used as a mask for the dirt layer in your material, it is important to remember that black areas will mask your dirt texture, which will only be visible in the areas where the mask is white in colour.
Here is my final material created with the above mask:
Conclusion
Hopefully some of the techniques in this tutorial will prove useful. The methods used are by no means definitive and I would urge you to experiment with your material creation, as such experimentation can often lead to useful accidents and new methods of creating materials.
Tutorial written by David Hier
If you found this tutorial useful, please feel free to share it with others via Twitter:
Free Models
If you want to try out the textures created for this tutorial, I have included them in the following 3D models.
Download Sketchup Model (4.38 MB) » - via Google 3D Warehouse.
Download Thea Render Scene (78.8 MB) »
Please Note: One or more textures in these 3D models have been created with images from CGTextures.com. These images may not be redistributed by default, please visit CGTextures.com for more information.
- « Previous
- 1
- 2
- 3
- 4