David Hier Render Studio: 3D Modelling & Rendering and Architectural & Product Visualisation

Normal Maps with Sketchup and Thea Render
by Nige Copeland
While doing my latest project I quickly found out having loads of geometry based detail was crippling Sketchup, so out of interest I thought I’d have a go at creating normal maps and textures with the help of Thea Render.
Sketchup Modelling
In Sketchup create a metre square plane, to make my model I used the offset tool to create the outer edge, drew lines so I had 4 outer beams and four planks, I selected each section in turn and made it a group,
Using the “Texture” tool I applied my wood and metal textures, then extruded each group to the correct height and used the round edge tool to help create the shape to the objects.
Explode all groups and re-group as one object. I then used a cylinder and extruded it to make the rivets, using the round edge tool to curve them (I should of made mine higher). Again make all the rivets on group

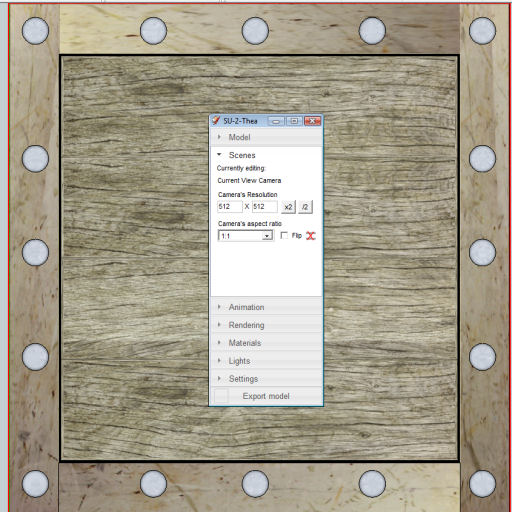
Change the view in Sketchup to top and zoom in until it fills the work area top and bottom. Open the Sketchup to Thea plugin, set the scene resolution to 512×512, our object needs to fit in the red square. I tried both ways, having Sketchup in parallel and perspective view and found perspective better, but it doesn’t matter really.
You can download my the Sketchup file for this tutorial here »
Rendering Scene with Thea
Export the scene to Thea and use a very simple Light tent HDRI so the model doesn’t cast strong shadows.
Use a BSD render and enable Ambient Occlusion and set multiply.
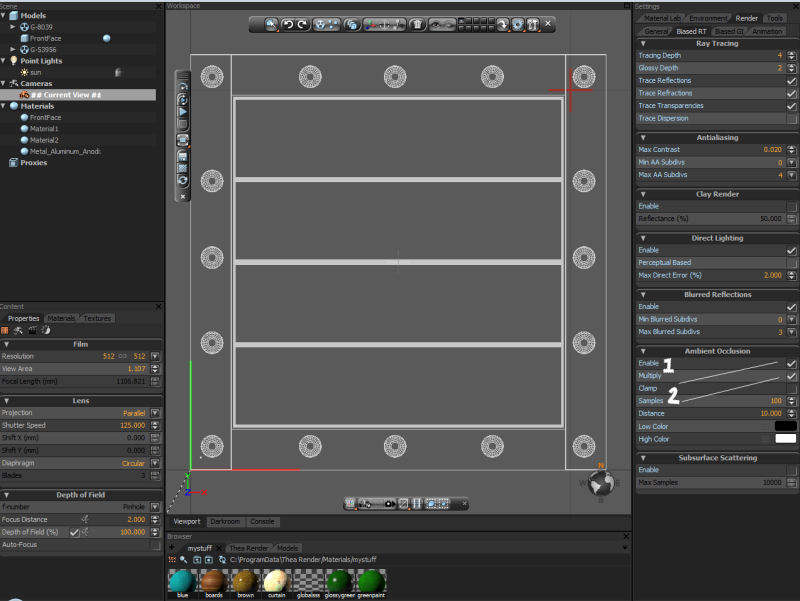
Select AO and the normal channels.
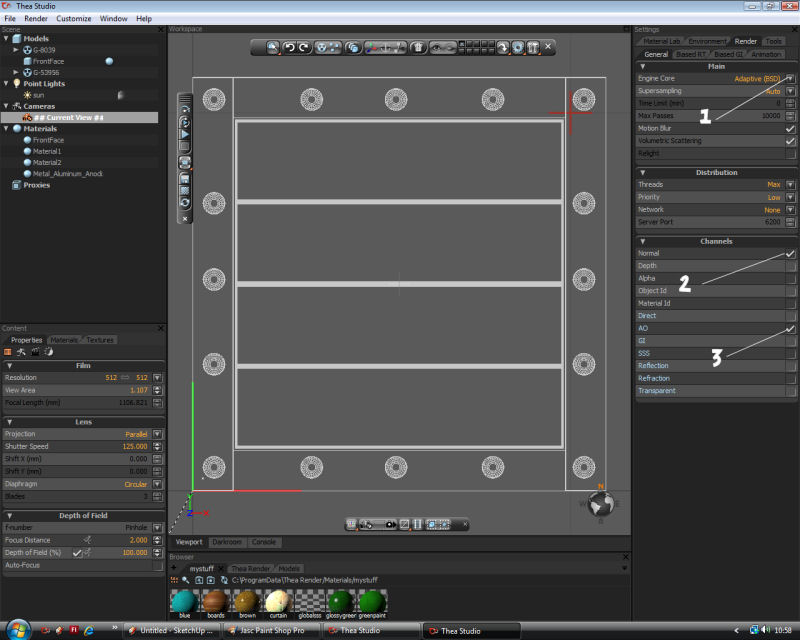
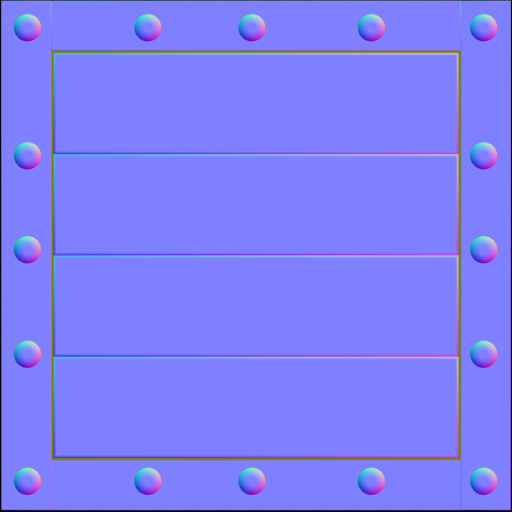
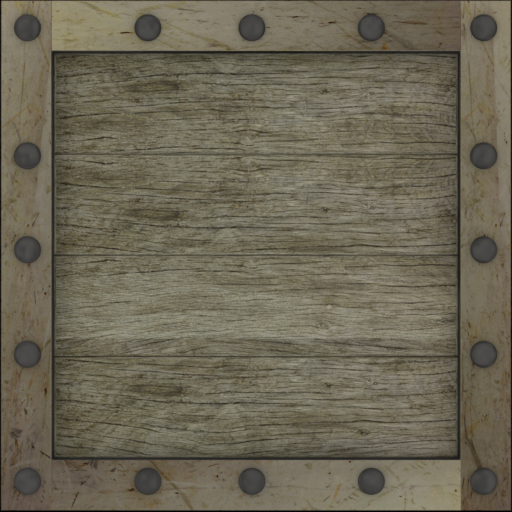
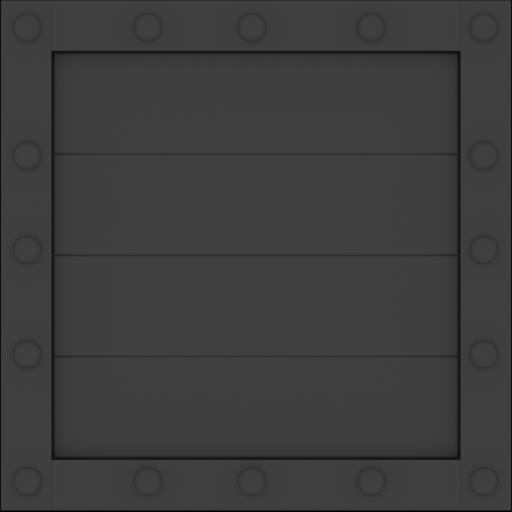
Render your image and save the Colour, AO and Normal images. Also save the scene so you can re render larger maps.
Applying Textures in Sketchup & Final Render
In Sketchup model a 1m square cube and create a new texture from your texture map. Group the cube and apply the texture, open the group and select all faces - using TomTom’s UV toolkit2 “fit to quad faces”.

Export the cube to Thea and add the normal map. Set the value to about 20% and start a test render.
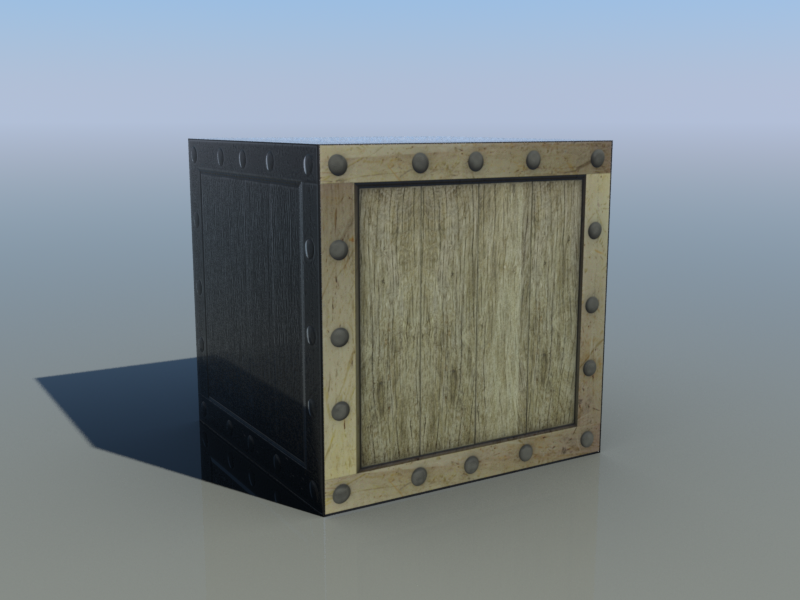
If everything looks good re-render your maps at a higher resolution.
About the Author
This tutorial was written by Thea Render beta tester Nige Copeland. You can contact Nige via email and view examples of his work via his deviantART gallery.
More Tutorials
More tutorials written by Nige Copeland: